The COVID-19 pandemic turned the whole world upside down in only a few weeks. People want to meet up with their closest friends, yet this proves difficult in regard to the social distancing and stay-at-home regulations.
The Solution and how it works: The Jackbox Party Pack
Recently, I discovered the Jackbox Party Pack – a collection of 5 games from jackbox games. Currently, there are 6 different party packs available containing 5 new games each, for the affordable prices of around $10.00 - $30.00 per pack (including sale prices). Let’s have a look at how the party packs work:
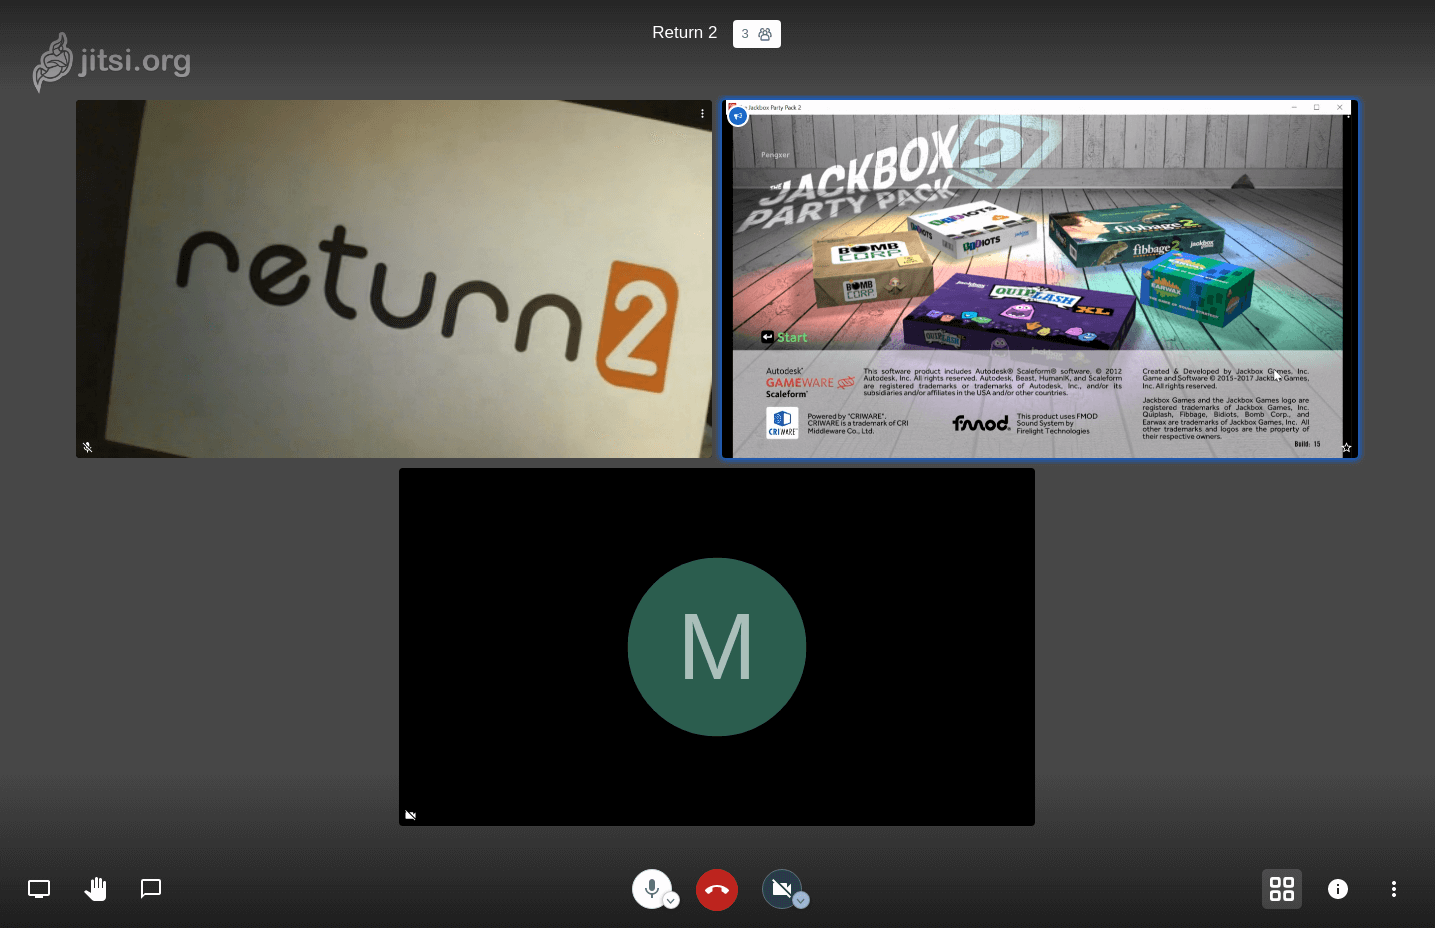
One player has to purchase a party pack which he/she can install on his/her computer (works on Windows, macOS and Linux). It is recommended to project the computer screen on a TV so everyone can see what’s going on (use a HDMI cable, Google Chromecast or something similar to solve this). Then, every guest (player) needs a smartphone or tablet to connect with the game server via the website jackbox.tv. The game begins after each player enters the room code that is displayed on the PC / TV of the party host. The smartphones now function as personal controllers for example for answering questions, drawing pictures, tabbing on things and so on (depending on the respective game).
There are different types of funny and creative games in a pack. To get an idea of the crazy game creations, here’s the official trailer of the first party pack:
Best Practices for Remote Playing
To increase the fun, I summarized and outlines the – in my opinion – best practices for enjoying the "Jackbox Party Pack":
Every player needs:
- A device to join the video conference (recommendation: PC / LapTop)
- A device to join the game (recommendation: smartphone)
- Some speakers / headphones, a microphone and eventually a webcam to communicate
The host needs additionally:
- A second device to host the game (recommendation: PC / LapTop)
First, you and your friends have to decide on a video conferencing tool that allows screen sharing. You could for example use Skype, Microsoft Teams, Discord, Zoom or any other available tool, but I personally recommend Jitsi! It's a free, secure and open source video conferencing tool, which does not require you to download annoying software or to create an account. You can start a call directly on the Jitsi Meet website or host it on your own server by simply starting some docker container.
As a host, just start the Jackbox Party Pack on your additional PC and share the screen and audio in the video conferencing tool. I know that this can also be done with a single computer but I find it a lot more comfortable to use one device for the game and another for communication. This also allows avoiding sound and video problems. Afterward, your friends should be able to see the screen (on their PC/Laptop?). Next, all players should open the game in full-screen mode and enter the game rooms by entering the displayed room codes as described above. Now everything is set for a fun game night!
Have fun, stay safe and take care! We are all in this together!
Common Problems and Solutions
Passing Audio to your Friends
Most of the games can be played without audio, even though the sounds and noises for sure increase the fun. However, sometimes players can't hear the game audio, which can have several reasons. "Jitsi meet" can't share the audio output, Linux users will fall into problems with Discord and Skype and so on. As you know: Audio works like printers – only with problems. The simplest solution for many audio-related problems is the use of two devices when playing (one for the video conference ad one for sharing the game). This way you can pass or route the audio output to the audio input (microphone input).
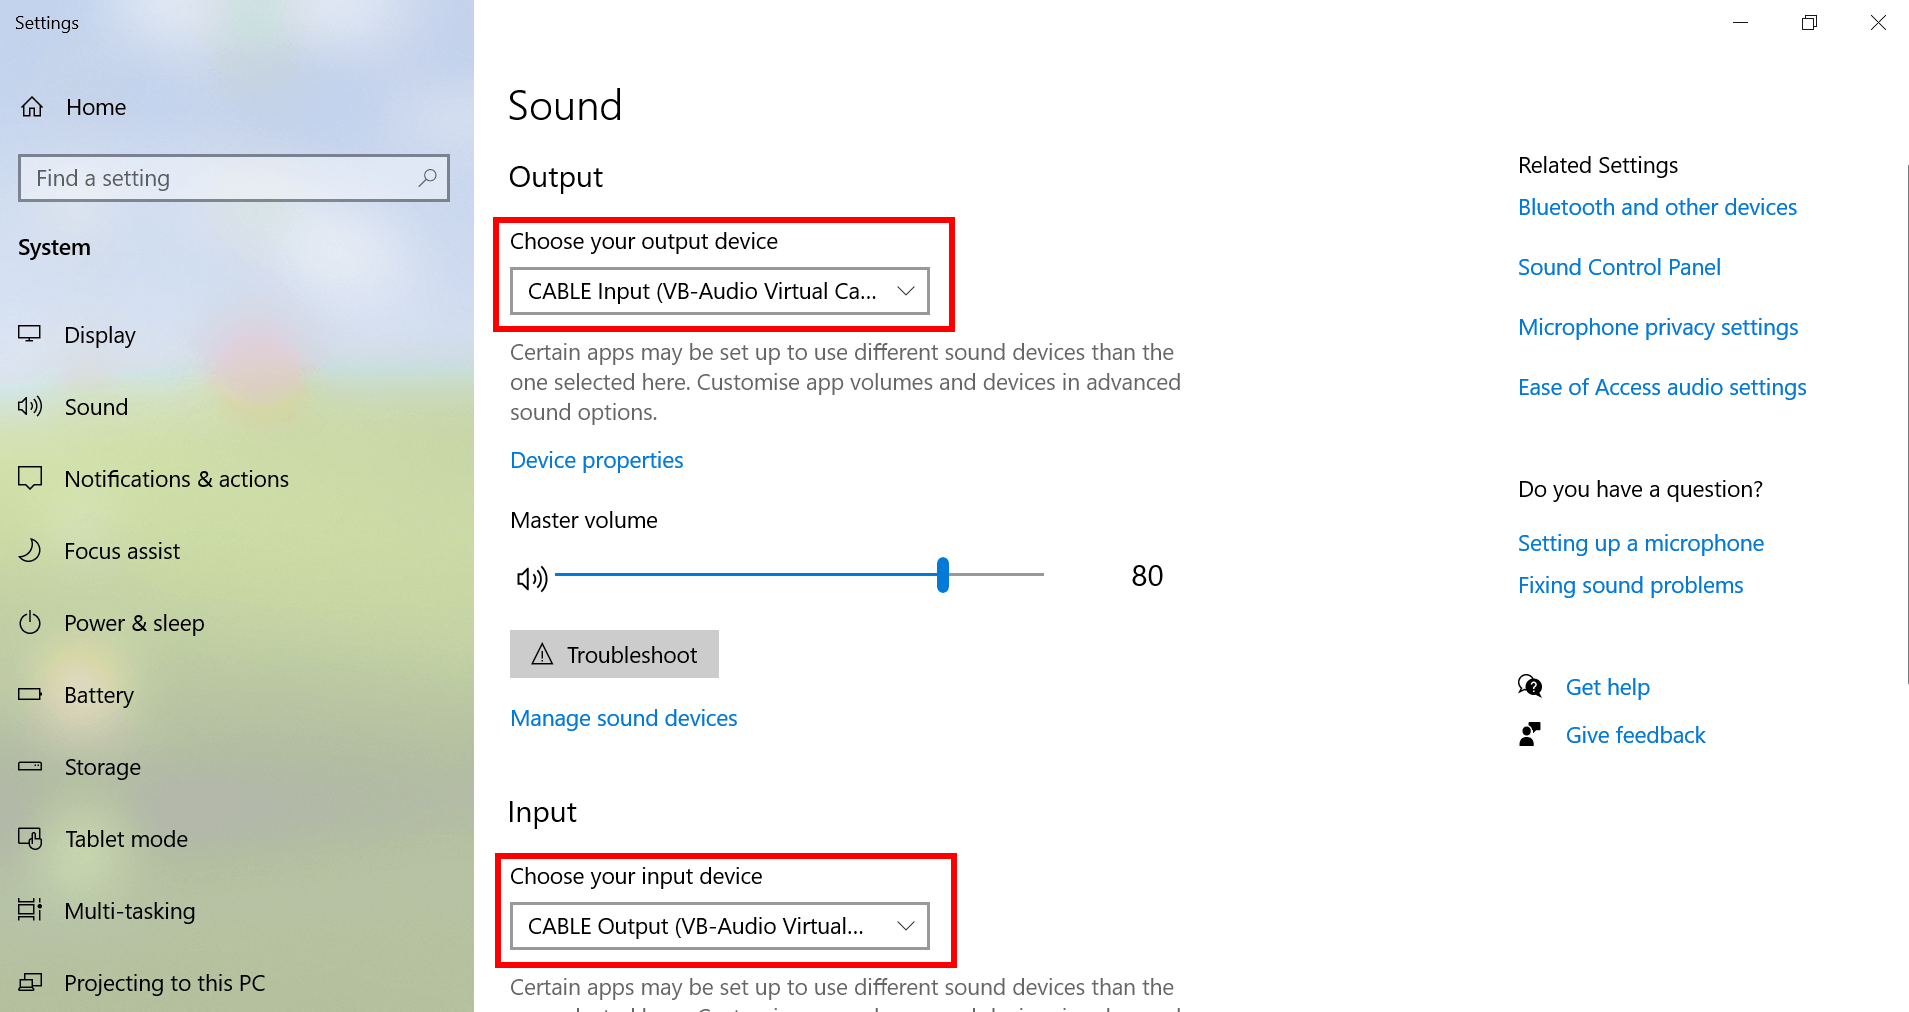
Windows Users
If the game host runs windows, you can download and install the free VB-CABLE Virtual Audio Device. After installation, go into your windows audio settings and select CABLE Input for your playback device and CABLE Output for your recording device. Remember to switch back the devices after finishing the game session, otherwise, you will run into sound problems later.
Linux Users
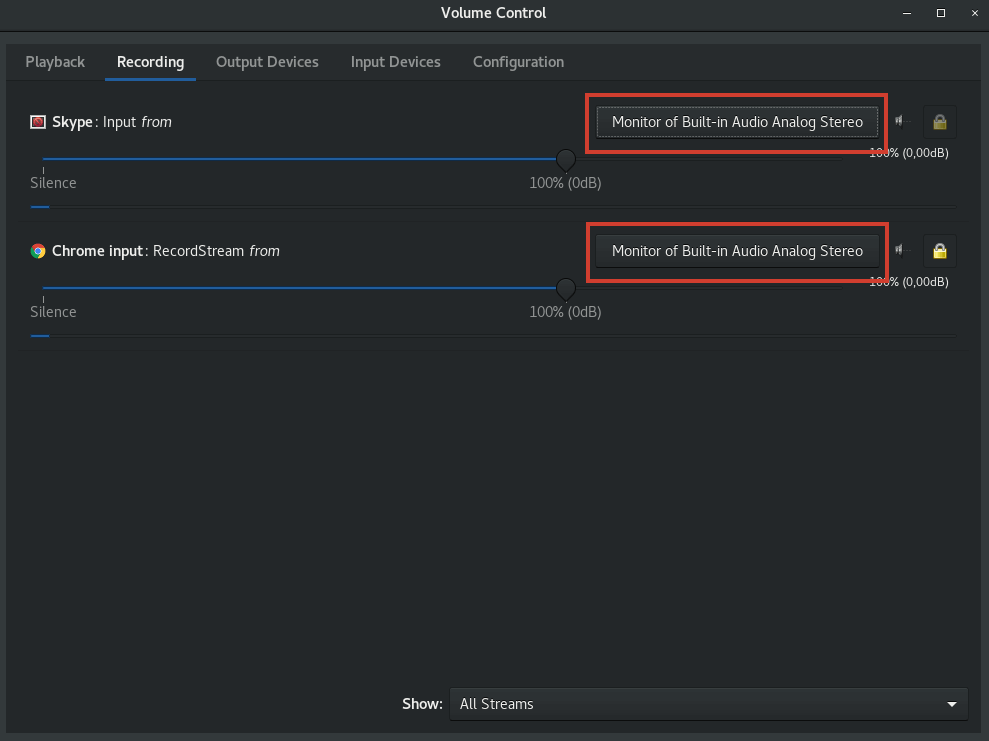
Install pavucontrol if you haven't already with sudo apt install pavucontrol on Ubuntu and run it in a terminal by typing pavucontrol. In the upcoming window select the Recording tab and change the device with the button on the upper right. Remember that your video conferencing tool needs to be running when changing the input device.
macOS Users (addition by @alex)
The best audio routing tool - by far - is Loopback from Rogue Amoeba. Unfortunately, it is quite expensive. But if you're just trying to simply route your audio from one application to another, the best free tool is Blackhole (which replaces Soundflower). After the installation, you will see a new audio interface with 16 inputs and outputs. Just select Blackhole as your default audio output and at the same time select Blackhole as your input device in your video conferencing tool (Jitsi, Zoom, etc.).
Jitsi Frame Rates
Perhaps you and your friends will notice a laggy shared screen related to a low frames per second (FPS) rate. This is related to the default FPS settings for screen sharing in Jitsi Meet.
If you host Jitsi Meet on your own server with docker-compose, go into the jitsi-meet-cfg/web folder and edit the config.js. Often this folder is located under your home directory (~/jitsi-meet-cfg/web). If you can't find it, checkout the location in your .env file. Uncomment the mentioned part and set the frame rates of your choices. I use min: 15 and max: 30:
// Optional desktop sharing frame rate options. Default value: min:5, max:5.
desktopSharingFrameRate: {
    min: 15,
    max: 30
},
After that, restart the server to apply the changes with docker-compose down and docker-compose up -d, just to be sure.
If you don't notice a difference, check your config.js again if it's overwritten by Jitsi. If so, add the changes again and store a copy of the file as custom-config.js in the same folder. This custom config won't be overwritten when you restart your container. More information can be found in this GitHub issue.
(Comment by @alex) ... I like using Zoom instead of Jitsi. Most of the time it is faster on my macOS machine than Jitsi.
References
- Header Image Background: Photo by Fusion Medical Animation on Unsplash