![[How-to] DSLR APS-C Sensor cleaning (Nikon Camera Example)](/content/images/size/w2000/2022/03/sensor-cleaning_header.jpg)
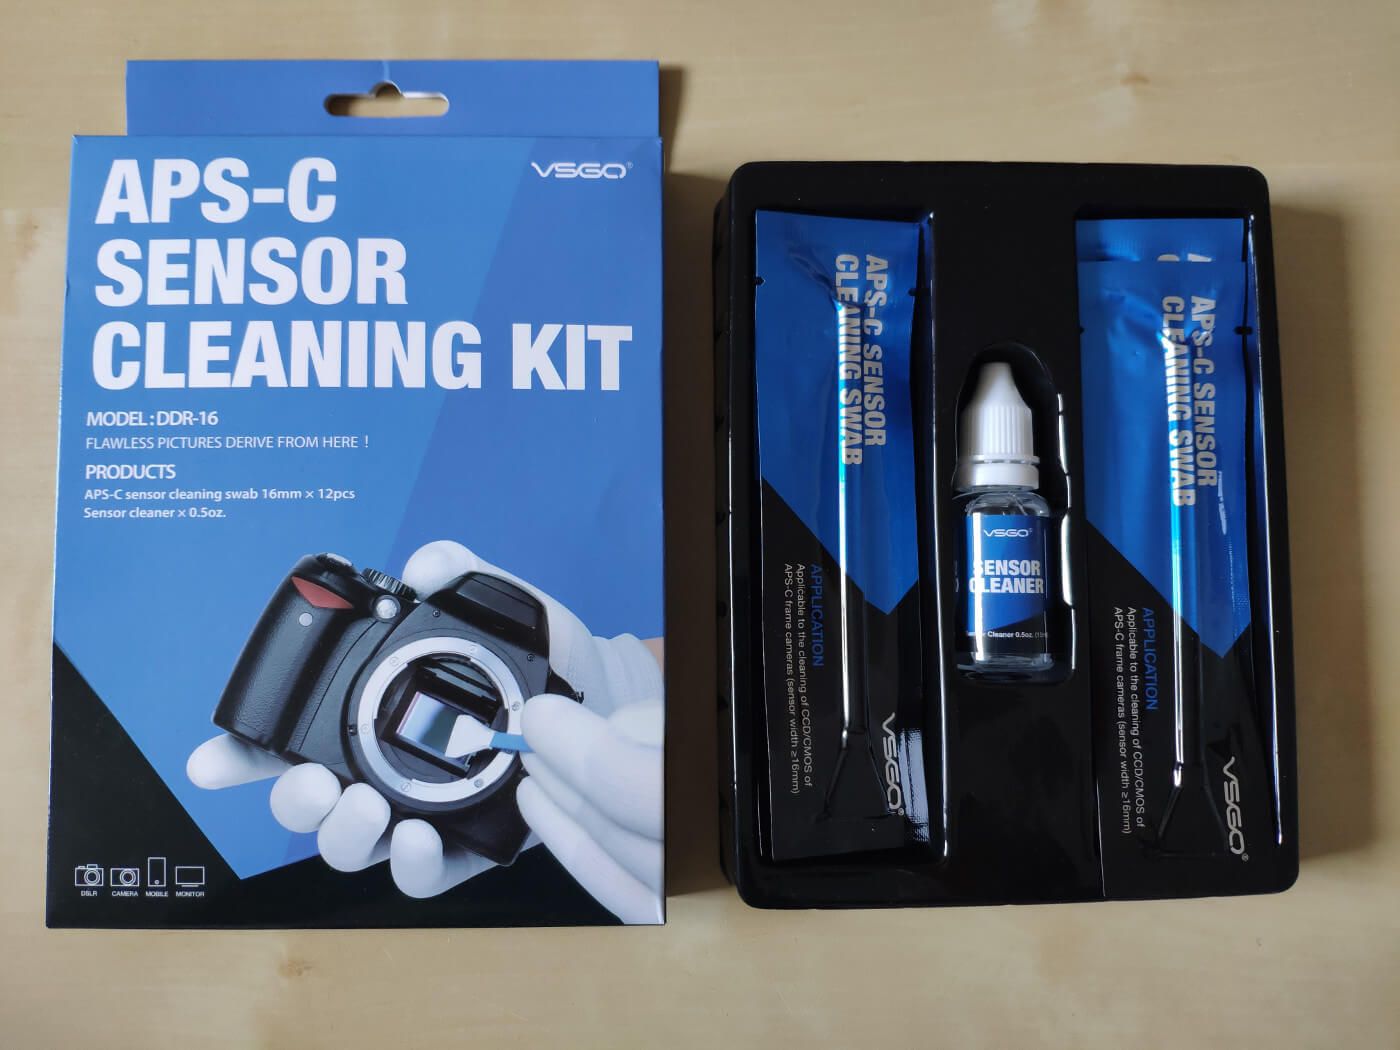
After using my Nikon D7100 DSLR camera for some years I noticed a few black points on every image. This is sensor dirt! I thought about paying a lot of money to send my camera to a professional store to clean it. However, after some research and evaluation of sensor cleaning products I decided to do it on my own. So I bought the APS-C sensor cleaning kit (Model: DDR-16) from VSGO*. It comes with a cleaning liquid and some cleaning swabs.
Sidenote: This article is not sponsored by VSGO! I choose and bought the article by myself!
Prepare your camera: Lock mirror up
Before you start, make sure you charge your camera batteries (this is important to unlock the internal mirror). Then, remove the current lens and turn on your camera. Go into Settings > Setup Menu and select "Lock mirror up for cleaning". If your batteries are too low, you can't select the option. Instead, Nikon will show you the unintuitive error message:
This option is not available at current settings or in the camera's current state.
If your read this message, charge your camera and try again!
If everything is okay, you will get the message
When shutter-release button is pressed, the mirror lifts and shutter opens.
To lower mirror, turn camera off.
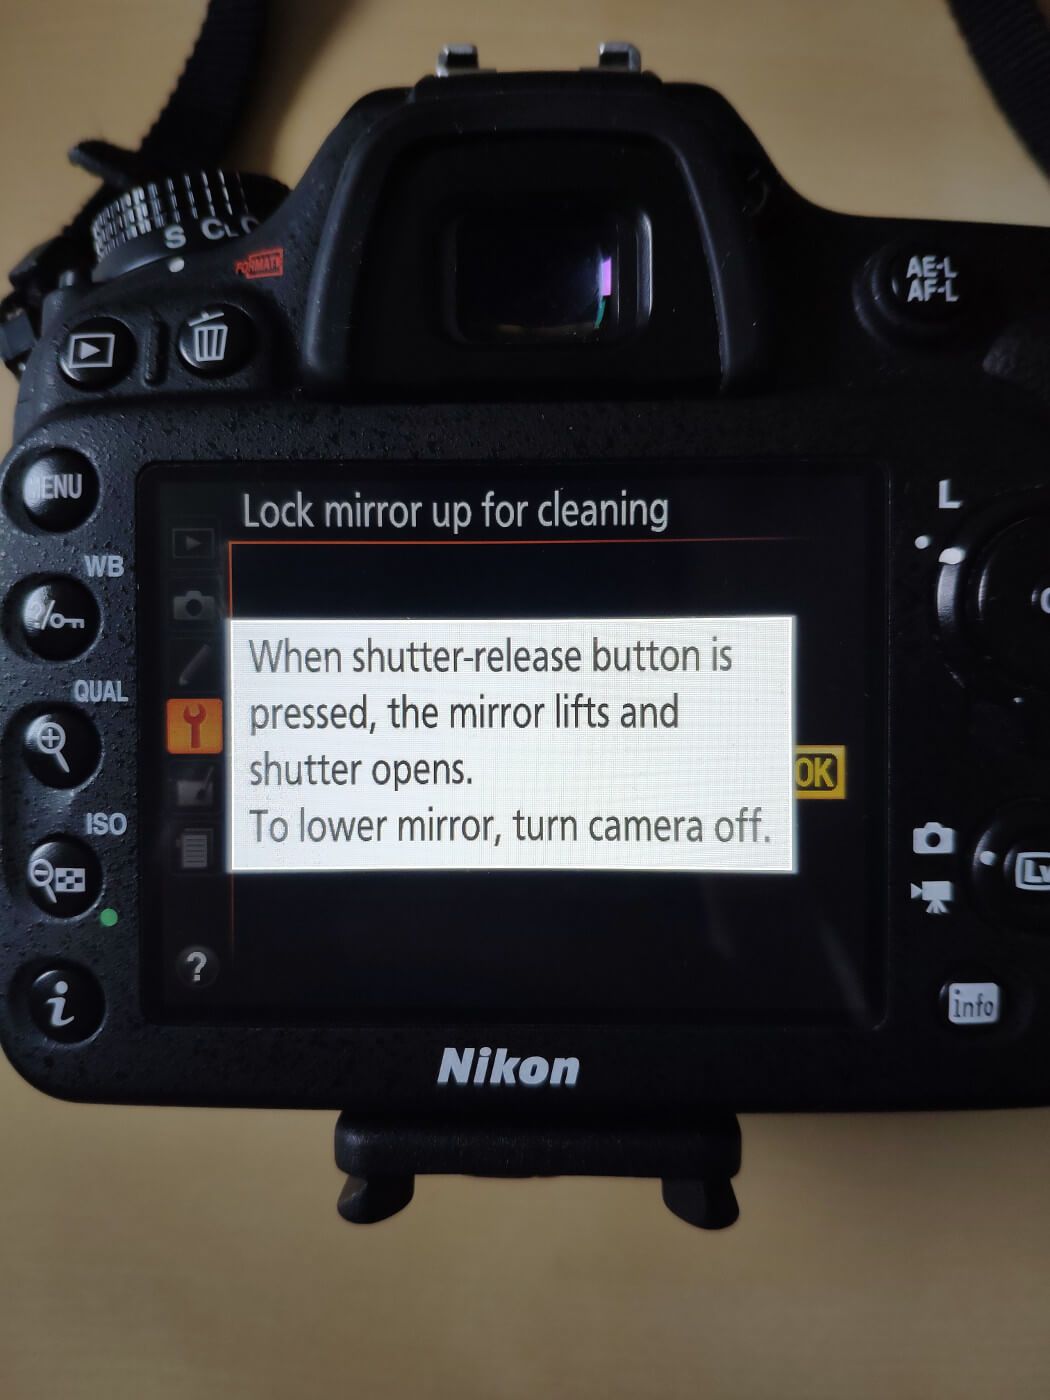
Press the shutter-release button as mentioned in the message. You will hear a click sound and you can now look directly onto your sensor.
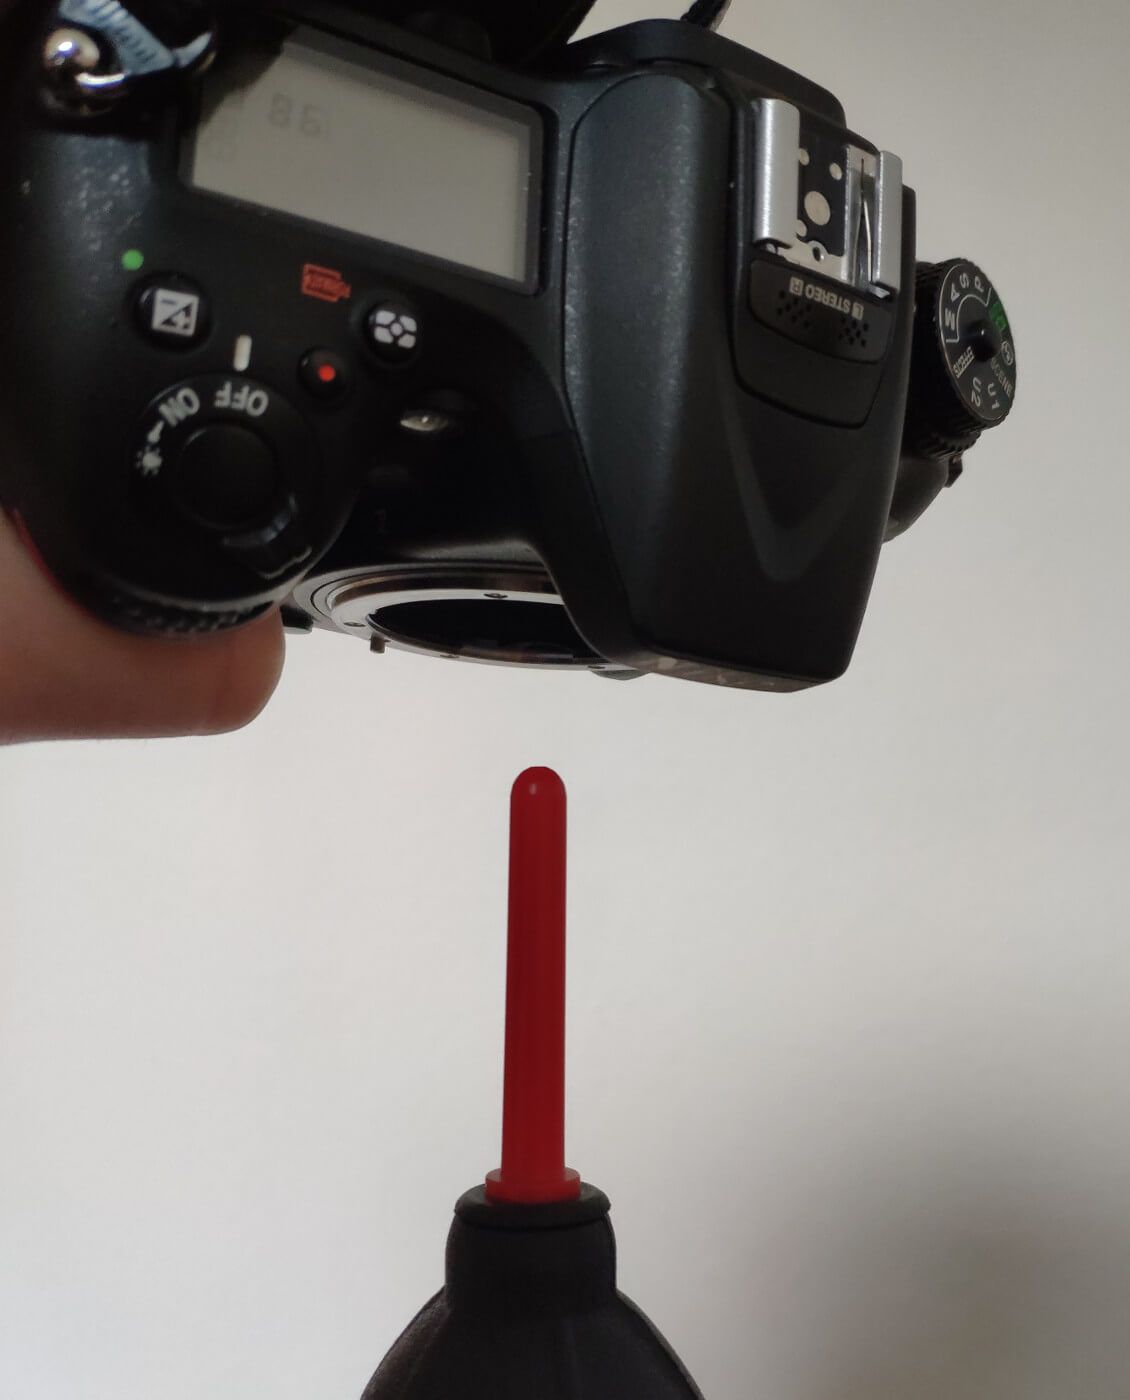
Remove coarse dust first
Before using the cleaning kit I suggest removing the coarse dust with a bellow. I use this one*. To do this, turn your camera upside down and push the bellow several times while holding the air tube on your sensor. This should remove the first dust behind the mirror.
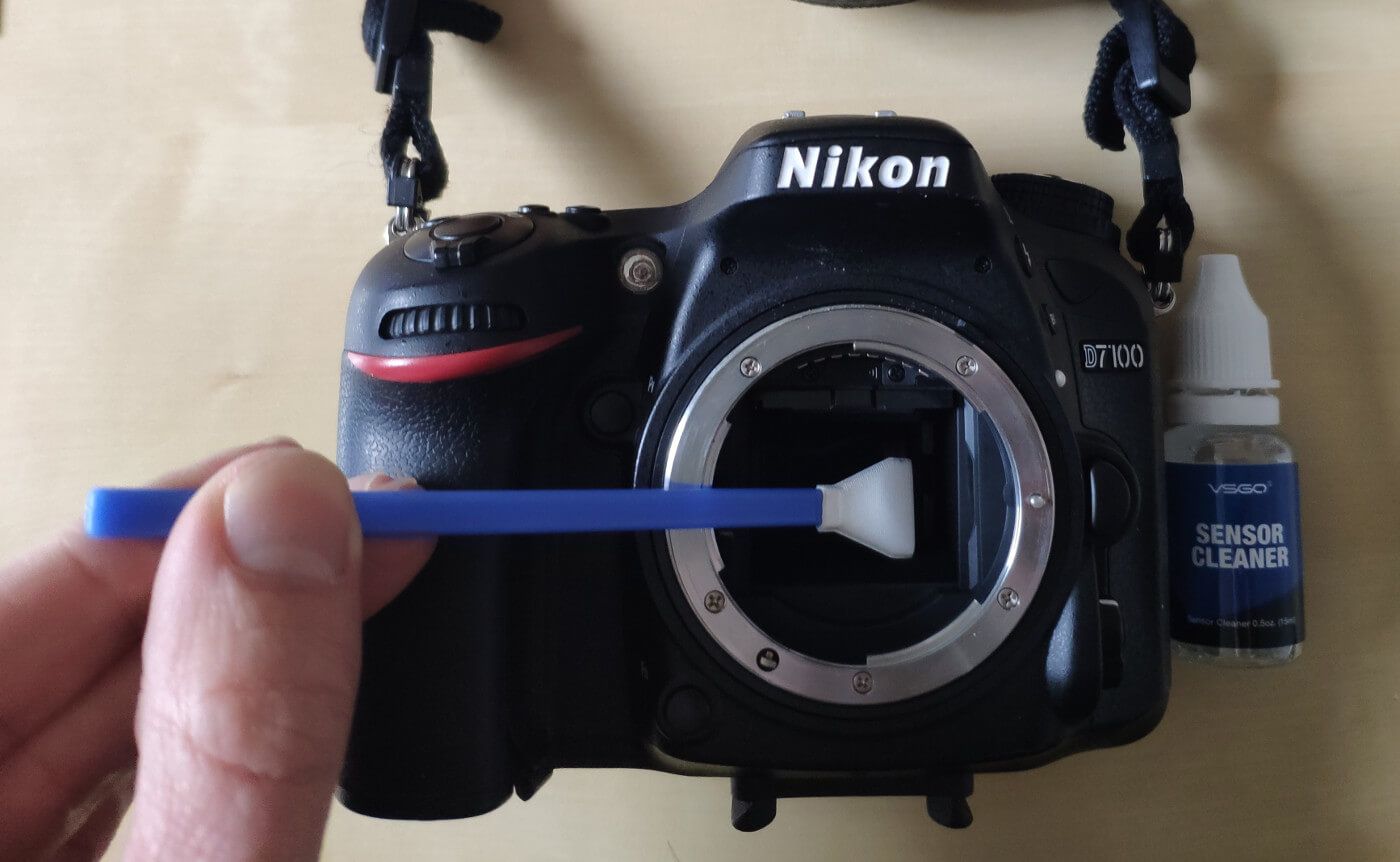
The real cleaning process
Okay, things getting serious, let's start the real cleaning process! I was a little bit scared because it was my first time cleaning the sensor and I was concerned to break something (spoiler: it sounds much worse than it is, so stay cool).
First, open the liquid and a swab and put 1-3 drops of the liquid onto the swab (not too much, otherwise it will be hard to remove the liquid from the sensor). Afterward, use it to skim over your sensor from left to right (or right to left) with slight pressure. I made it 2-3 times with both sides of the swab. Then, open a new swab and go again over your sensor to remove the surplus drops. The manual suggests using only one swab with one wet and one dry side for the cleaning process. I decided to use two, just to be sure: There are enough in the above-mentioned cleaning kit. And that's it! You just cleaned your sensor! Very nice and easy!
The last steps
To finish the cleaning process, turn off your camera. You will hear a click sound indicating that your sensor is now again protected by the mirror. Remove the used swabs, put your favorite lens back on the camera and take a test picture to see the difference!
Conclusion, Results, Before & After
The final question: Does it work? The answer: Yes, of course!
Here you can see two pictures of a white paper, shot directly before and after the cleaning process with the same lens. I cropped the upper left corner out of the images (that's the dirtiest region in my case) to better show you the differences. I edited the pictures just a little bit by increasing the contrast and adjust the brightness to make the sensor dust a little more visible.
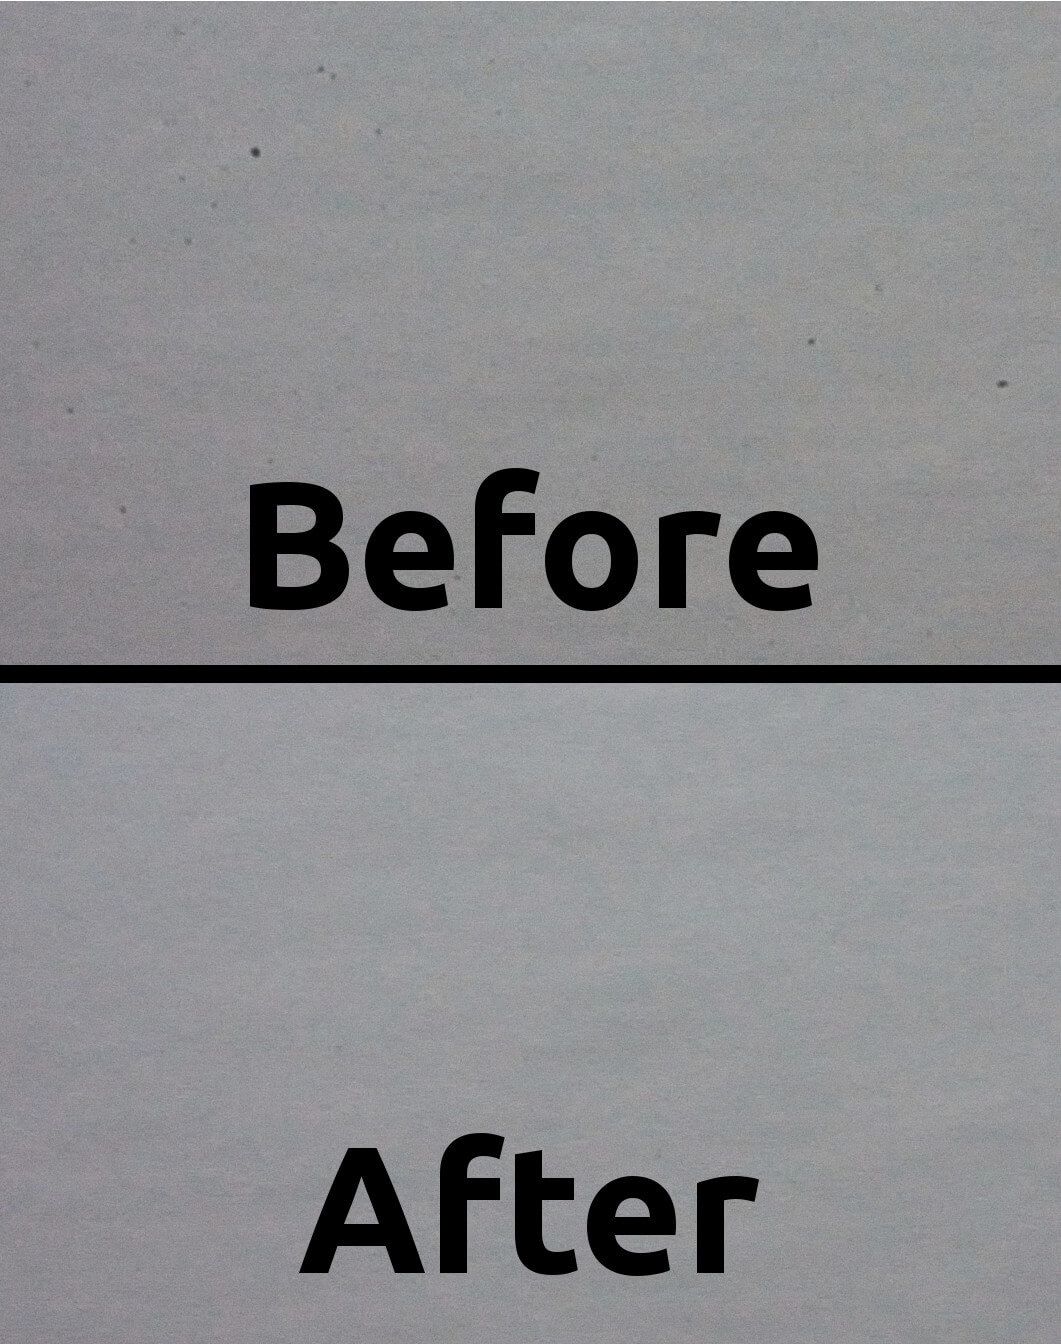
How you can see it worked, just better than I expected and much cheaper. So go on, buy the cleaning kit* and try it by yourself!